Set Up Lock
Installation guidance of different door locks
Browse by Products

Geofino G5

Geofino G5 Pro

Geofino G4 Pro
Installation
1. Smart Lock G5 / G5 Pro

1/12
You'll need to prepare:
1.Head Screwdriver
2. 4 AA Batteries

2/12
Please confirm the backset size:
2-3/8''(60mm) OR 2-3/4''(70mm)

3/12
2-3/8''(60mm):
1.Install the latch directly and no adjustment is needed.
2.Make sure the slotted hole is centered.

4/12
2-3/4''(70mm):
1.Rotate the latch for adjusting and extending the length.
2.Make sure the slotted hole is centered.

5/12
Tips:
Make sure the hole in the door frame is drilled a minimum of 1''(25mm) deep.

6/12
1.Please confirm the hole size:
More than or equal to 2-1/8''(54mm) OR Less 2-1/8''(54mm).
2.More than or equal to 2-1/8''(54mm): Install keypad directly
Less 2-1/8''(54mm): Remove the hole cover and install keypad directly.

7/12
1.Please make sure the tail bar is horizontal during the installation.
2.The IC wired need to be under the deadbolt.

8/12
Note: the screw of the mounting plate must be aligned with the screw of the latch.

9/12
Interior Assembly:
1. Connect the power cord.
2. Make sure the IC cord is wired not too long.

10/12
1.Install 4 AA batteries and battery cover.
2. Screwing on.

11/12
Confirm the direction of door:
Please face the smart lock display and twist the key.

12/12
Test if the lock is working properly.
2. Smart Lock G4 Pro

1/19
Please check the package list.
You'll need to prepare:
1.Head Screwdriver
2. 4 AA Batteries
2/19
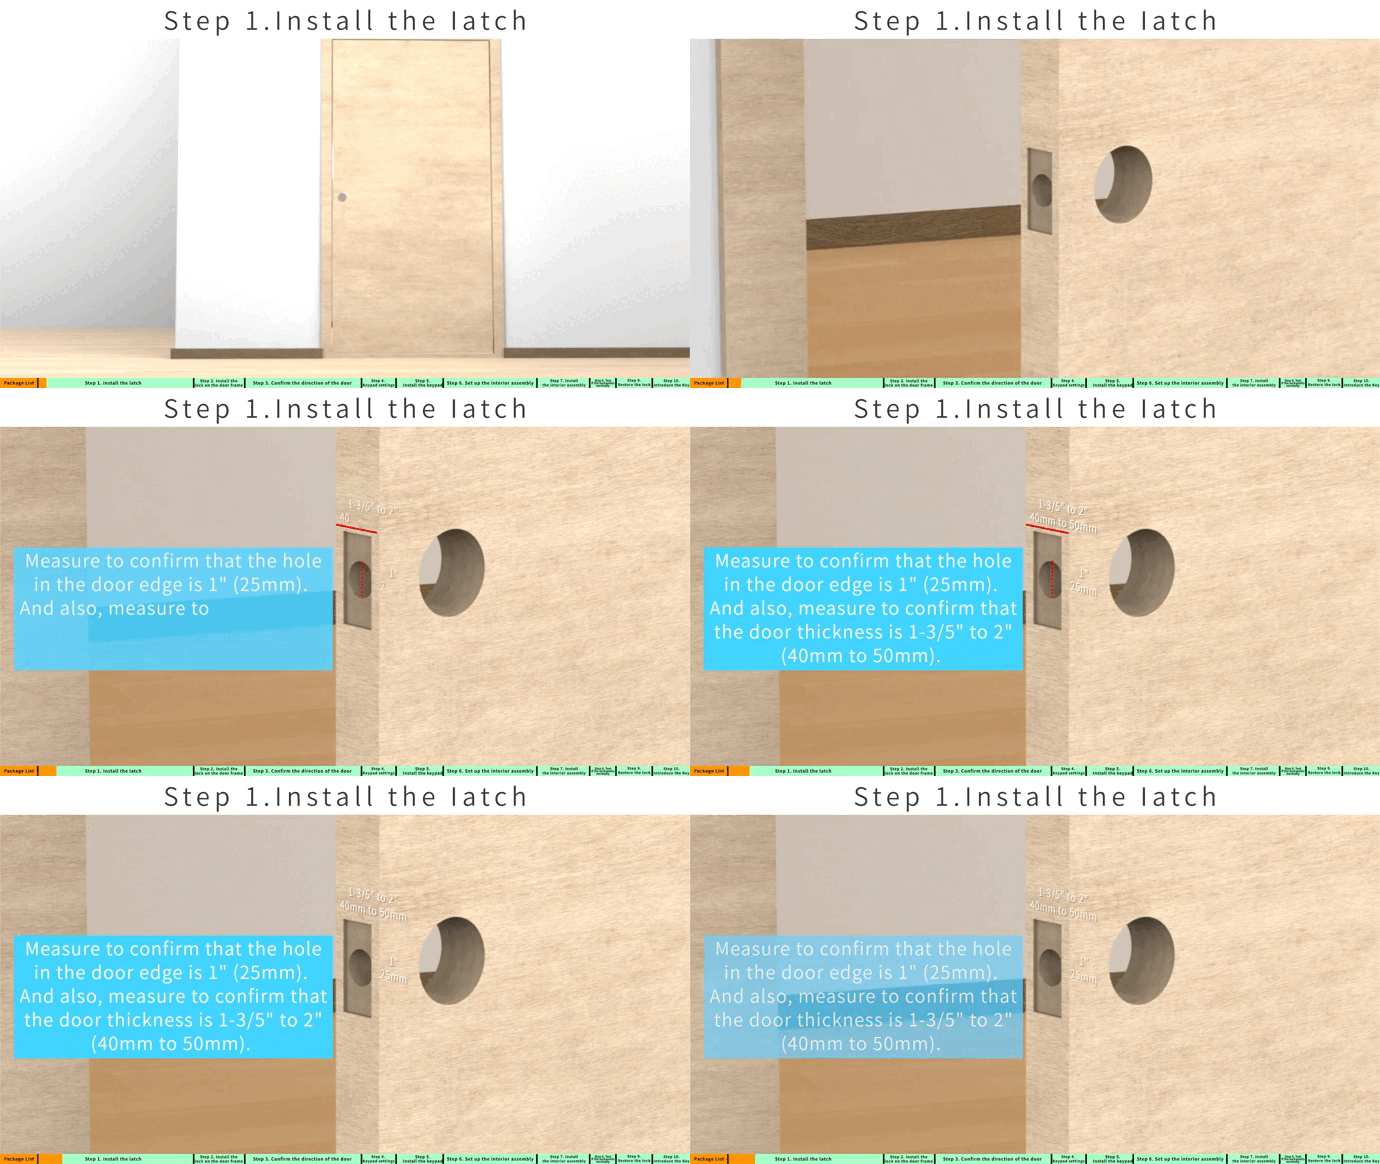
Please confirm the hole (in the door edge) size: 1''(25mm).
And confirm the door thickness is 1-3/5" to 2" (40mm to 50mm)
3/19
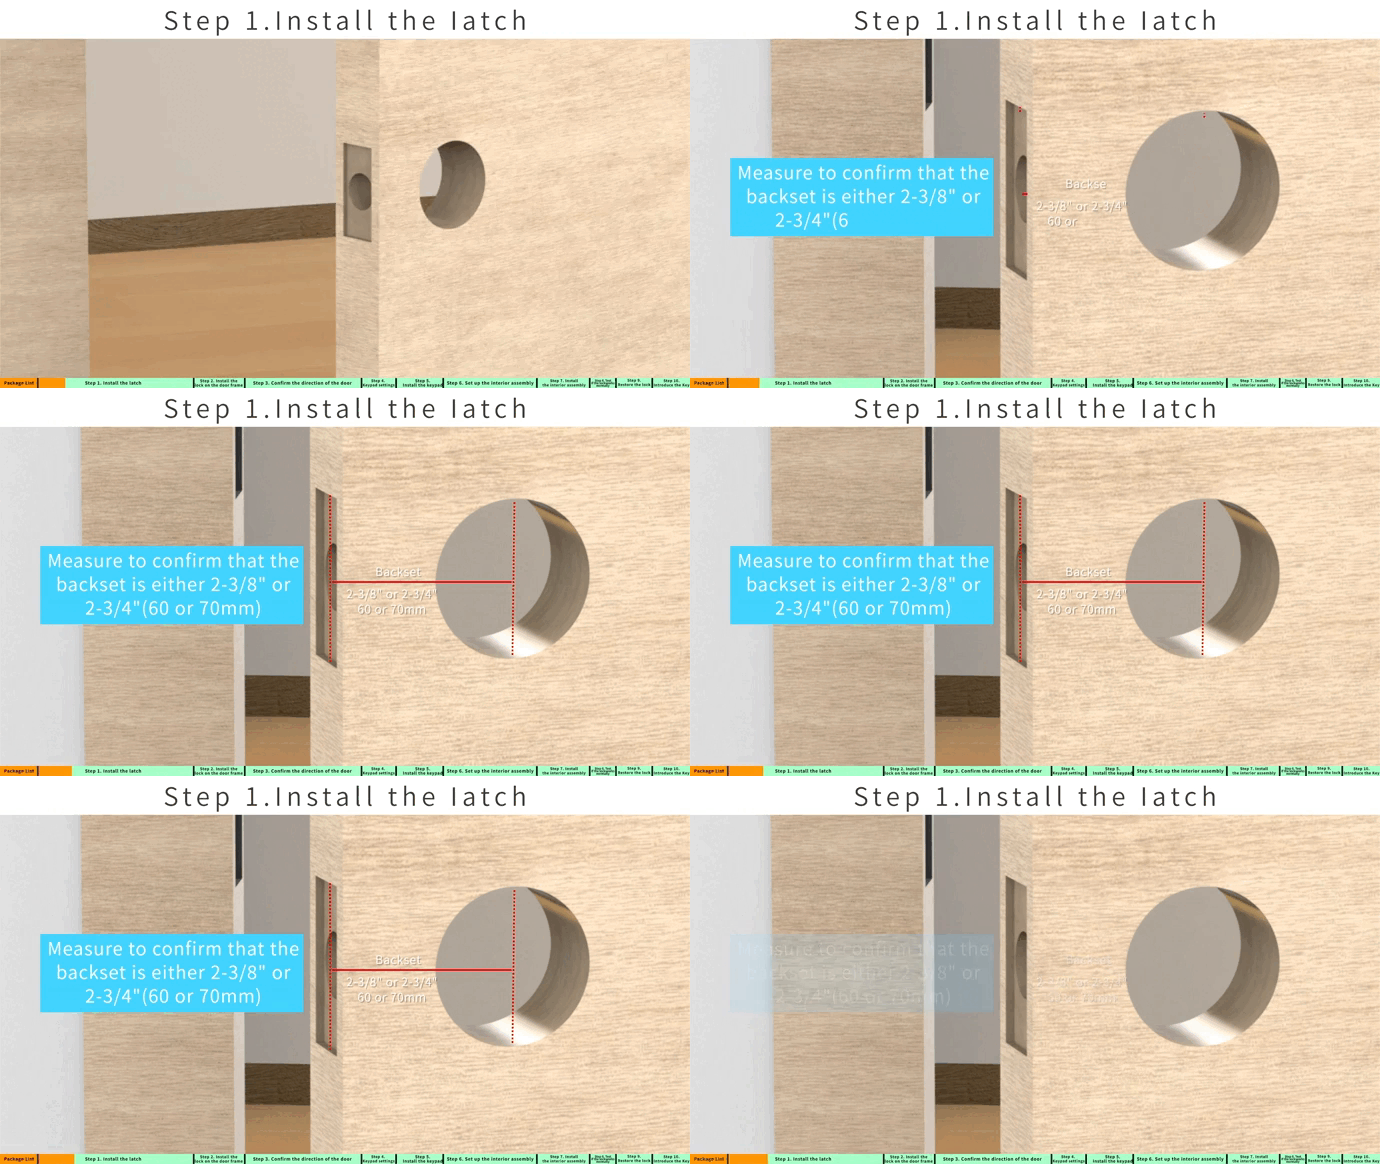
Please confirm the backset size:
2-3/8''(60mm) OR 2-3/4''(70mm)

4/19
2-3/8''(60mm):
1.Install the latch directly and no adjustment is needed.
2.Make sure the slotted hole is centered.

5/19
2-3/4''(70mm):
1.Rotate the latch for adjusting and extending the length.
2.Make sure the slotted hole is centered.
6/19
Tips:
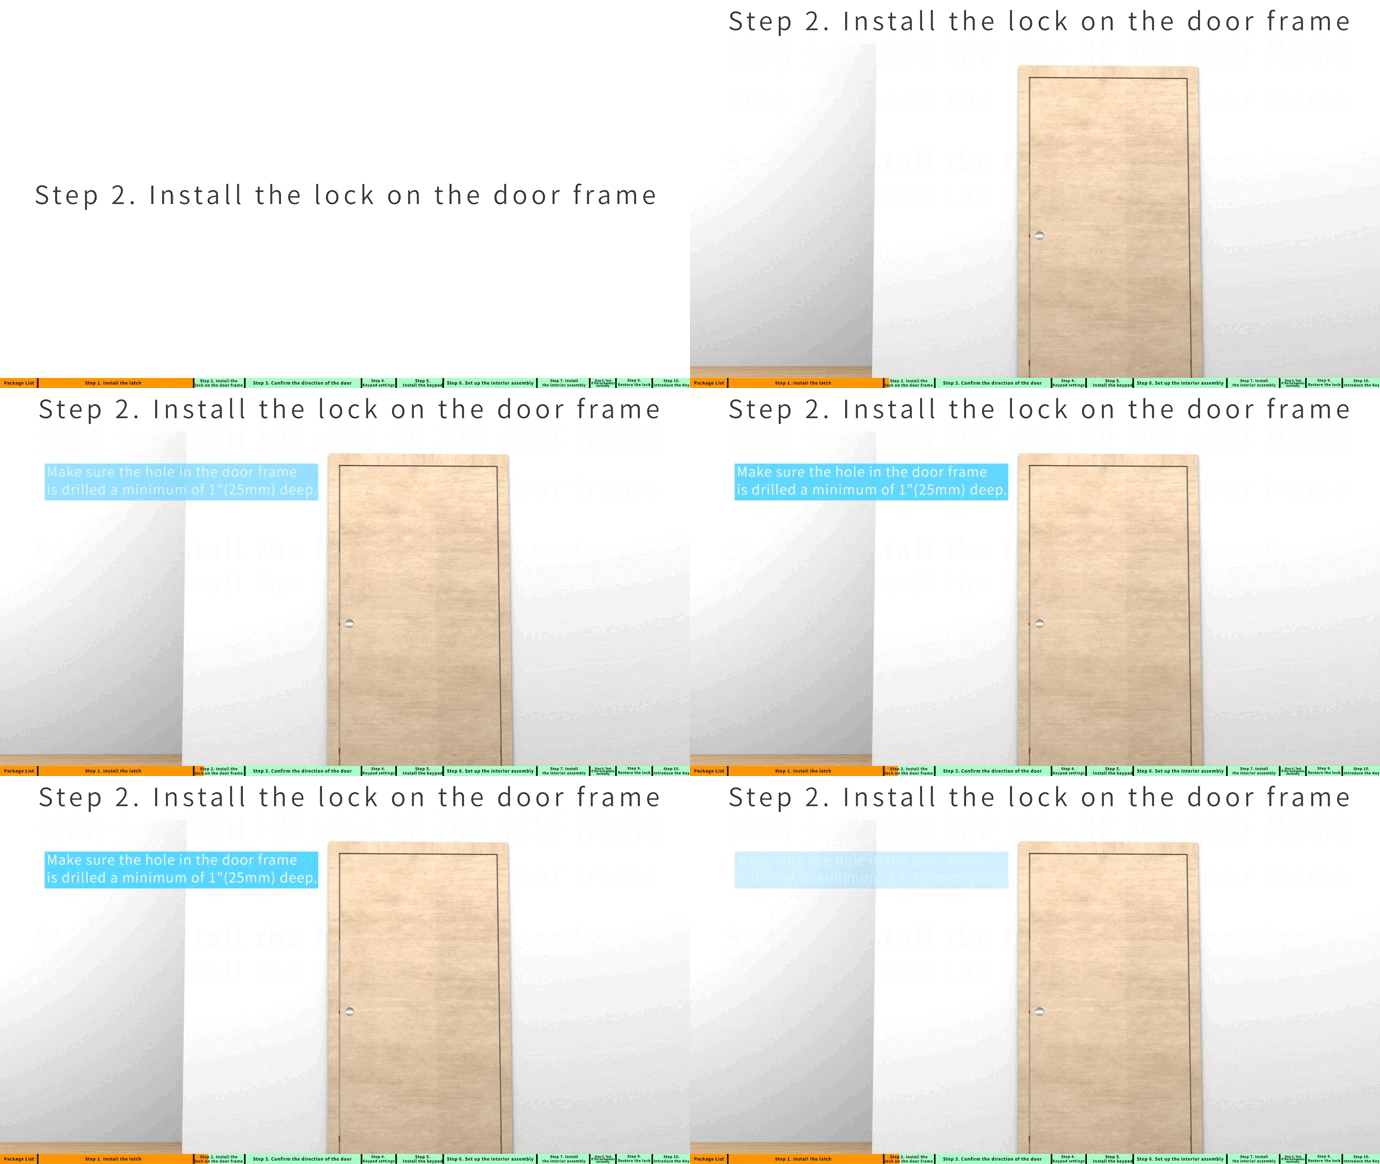
Make sure the hole in the door frame is drilled a minimum of 1''(25mm) deep.

7/19
Screwing on.
8/19
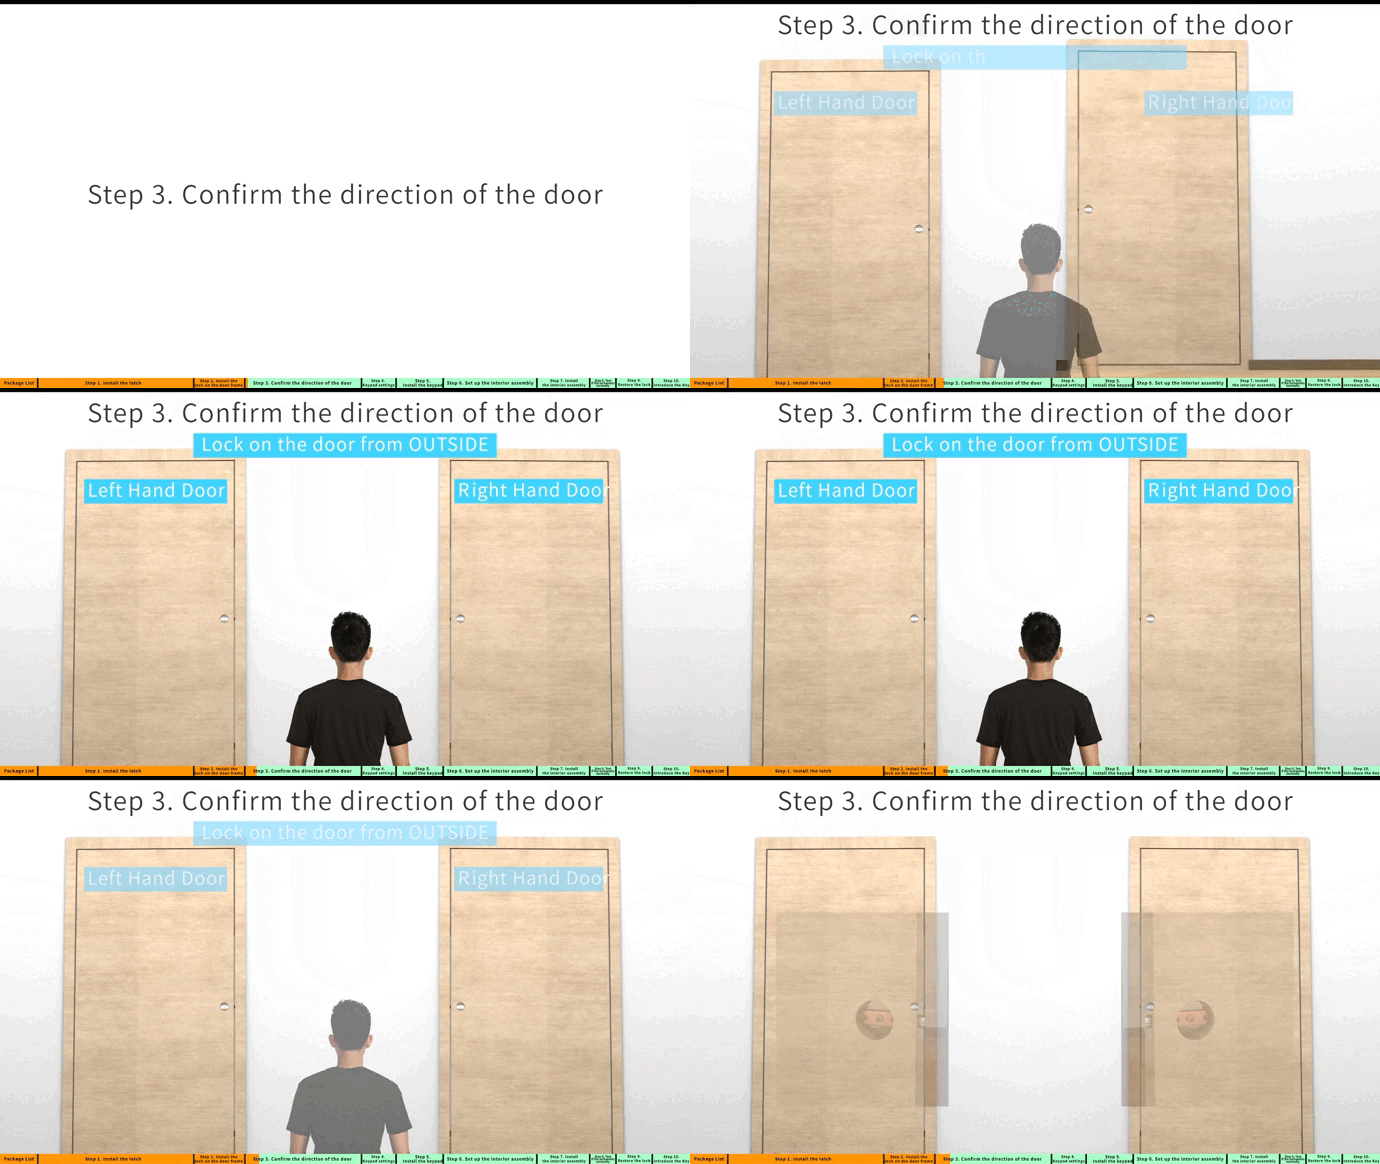
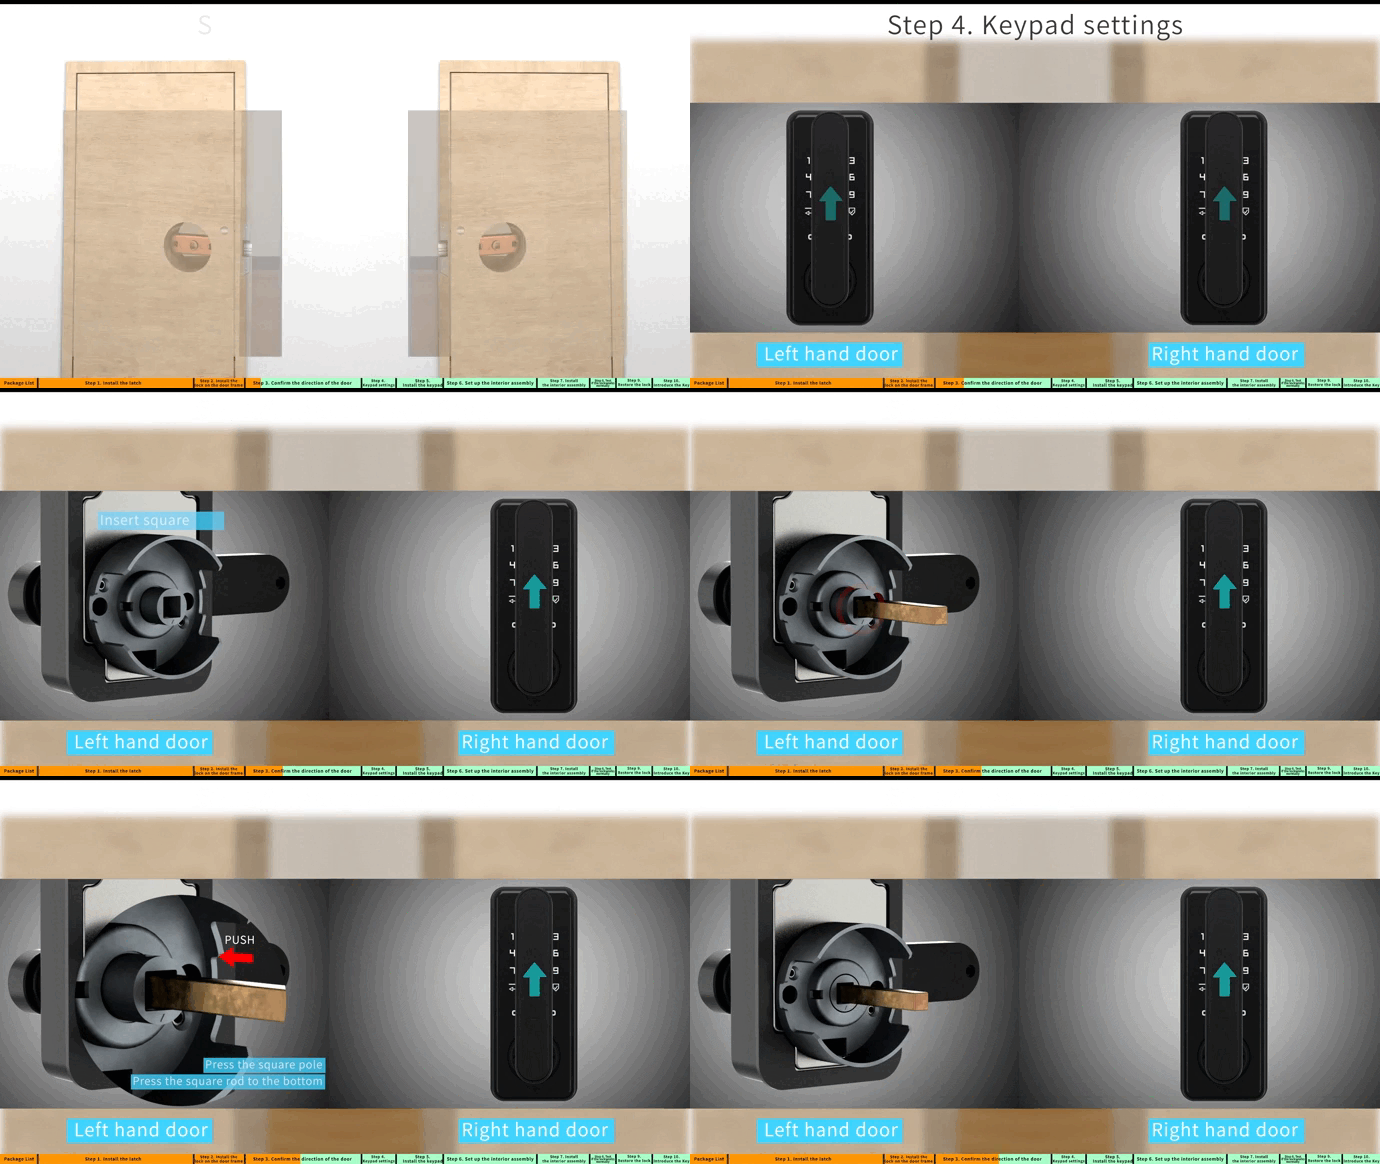
Confirm the direction of door:
Lock on the door from outside.
9/19
Left hand door:
1.Rotate the front handle 90° to the left.
2.Insert square hole.
3.Press the square pole and press the square rod to the bottom.
10/19
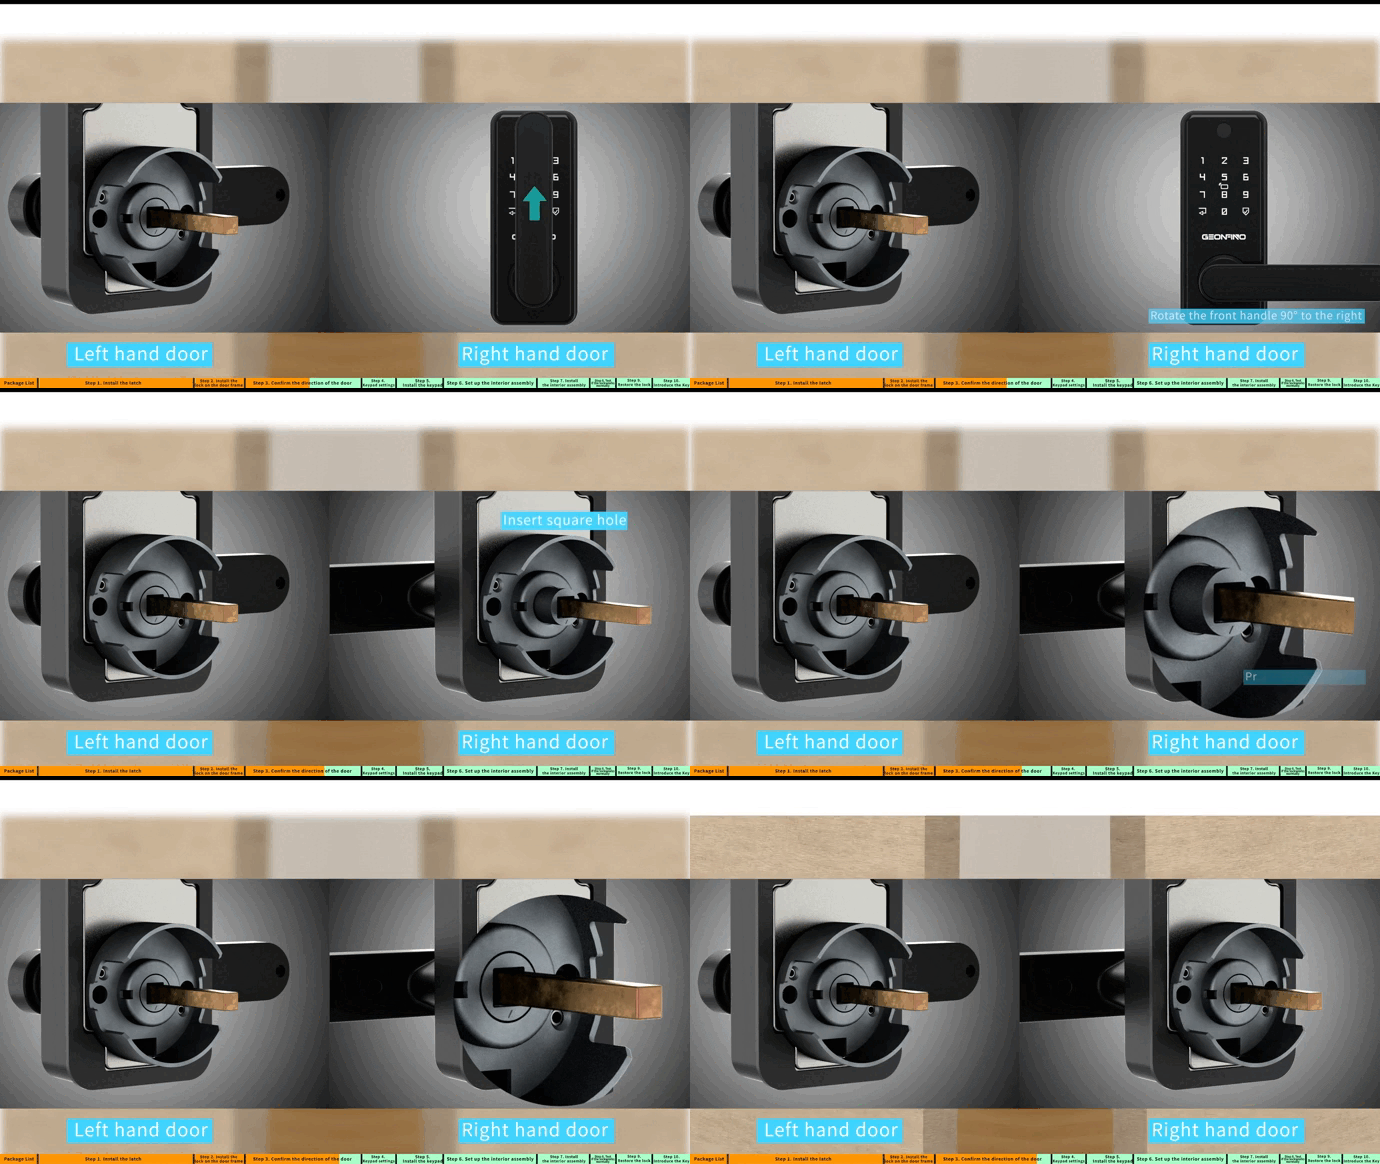
Right hand door:
1.Rotate the front handle 90° to the right.
2.Insert square hole.
3.Press the square pole and press the square rod to the bottom.
11/19
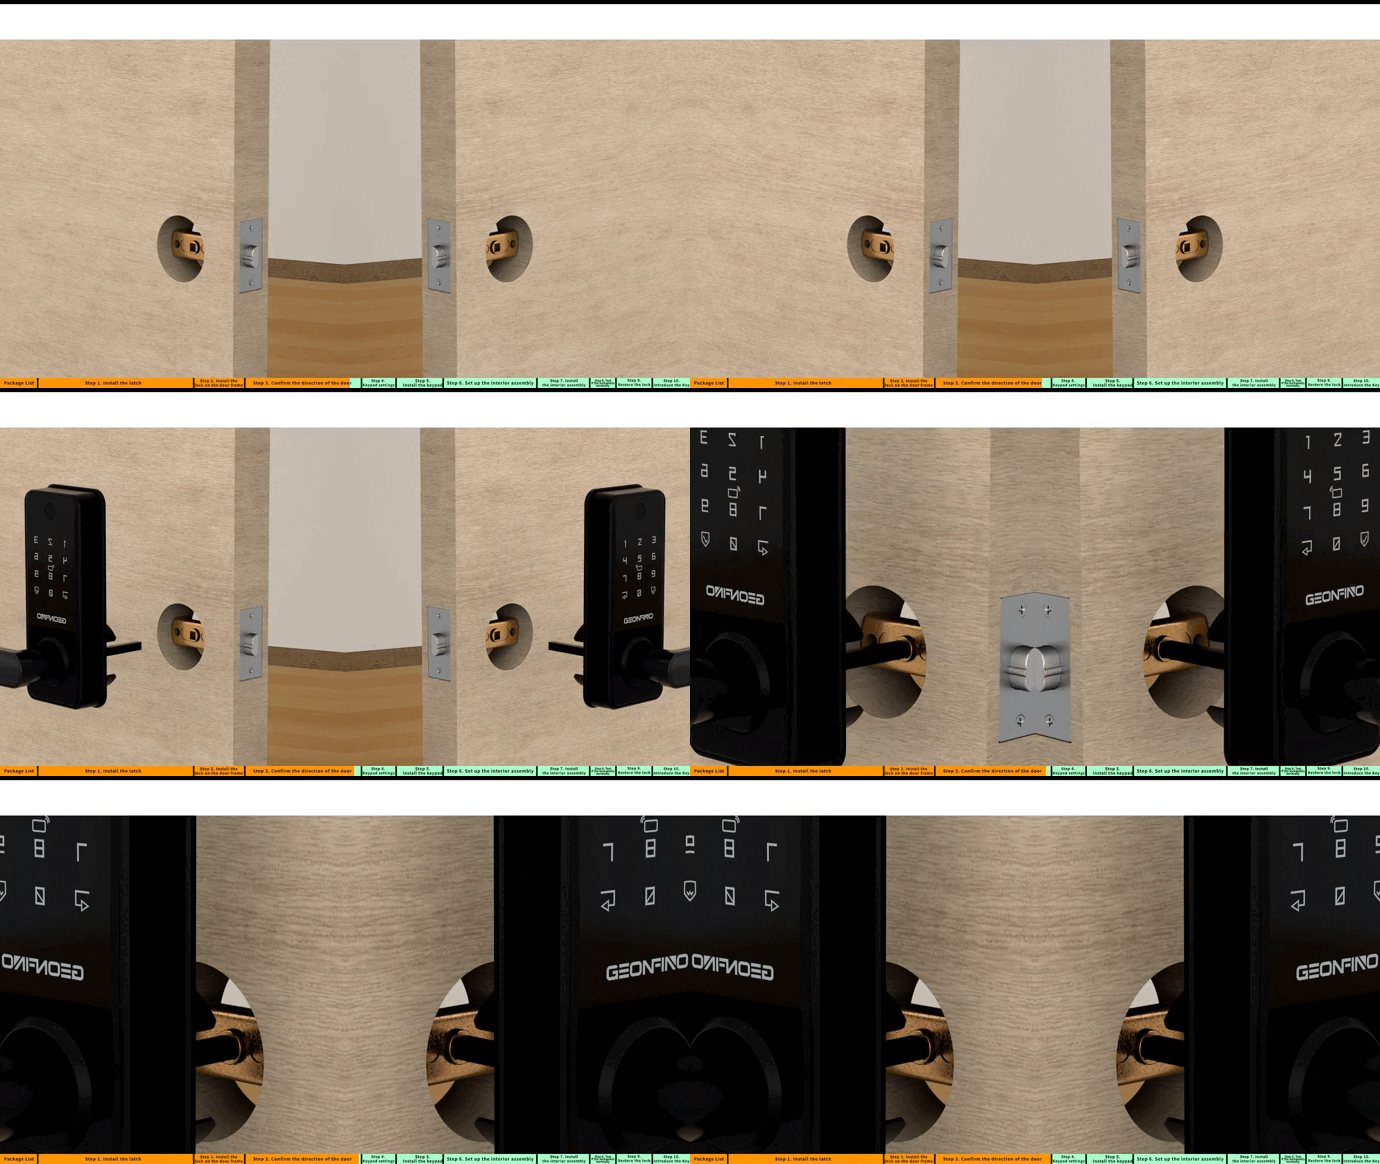
Install the keypad to the door.

12/19
How to restore the handle if you install the handle in the wrong direction:
1. Grab the square pole and pull it outwards.
2. Turn the handle to the correct position.
3. Press the square pole to restore.

13/19
1. Install the keypad directly.
2. The circular hole is centered with the square rod.
3. Screwing on.
14/19
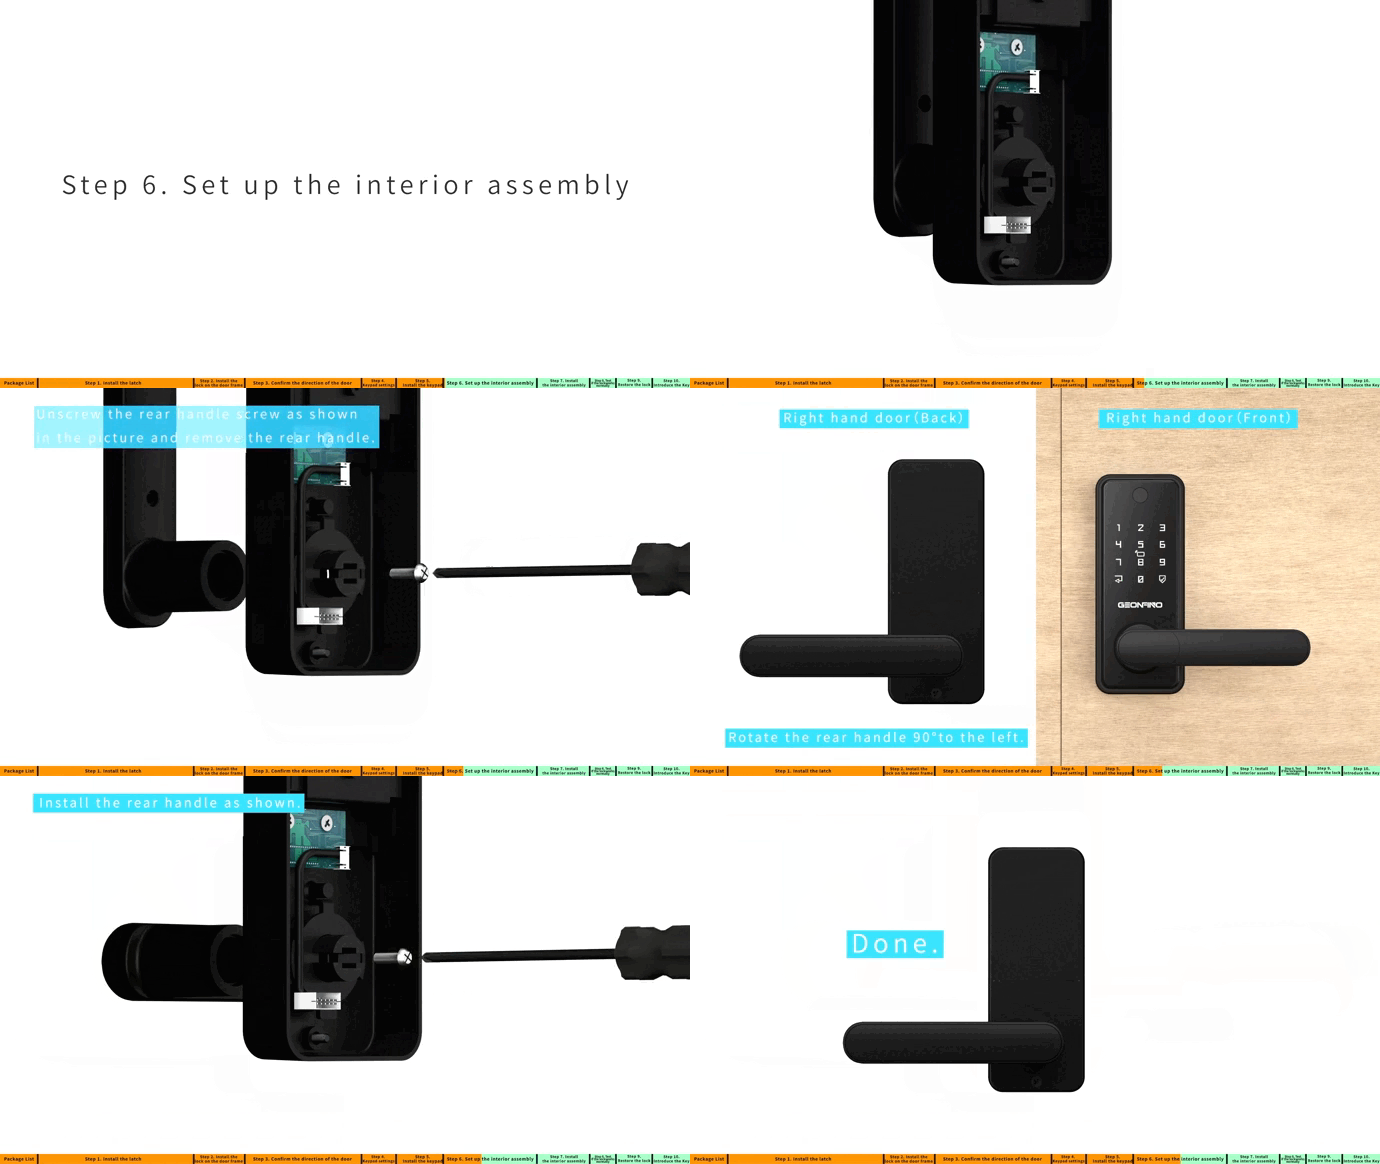
Set up the interior assembly:
1.Unscrew the rear handle screw as shown in the picture and remove the handle.
2.Rotate the rear handle 90° to the LEFT.
3.Install the rear handle as shown.
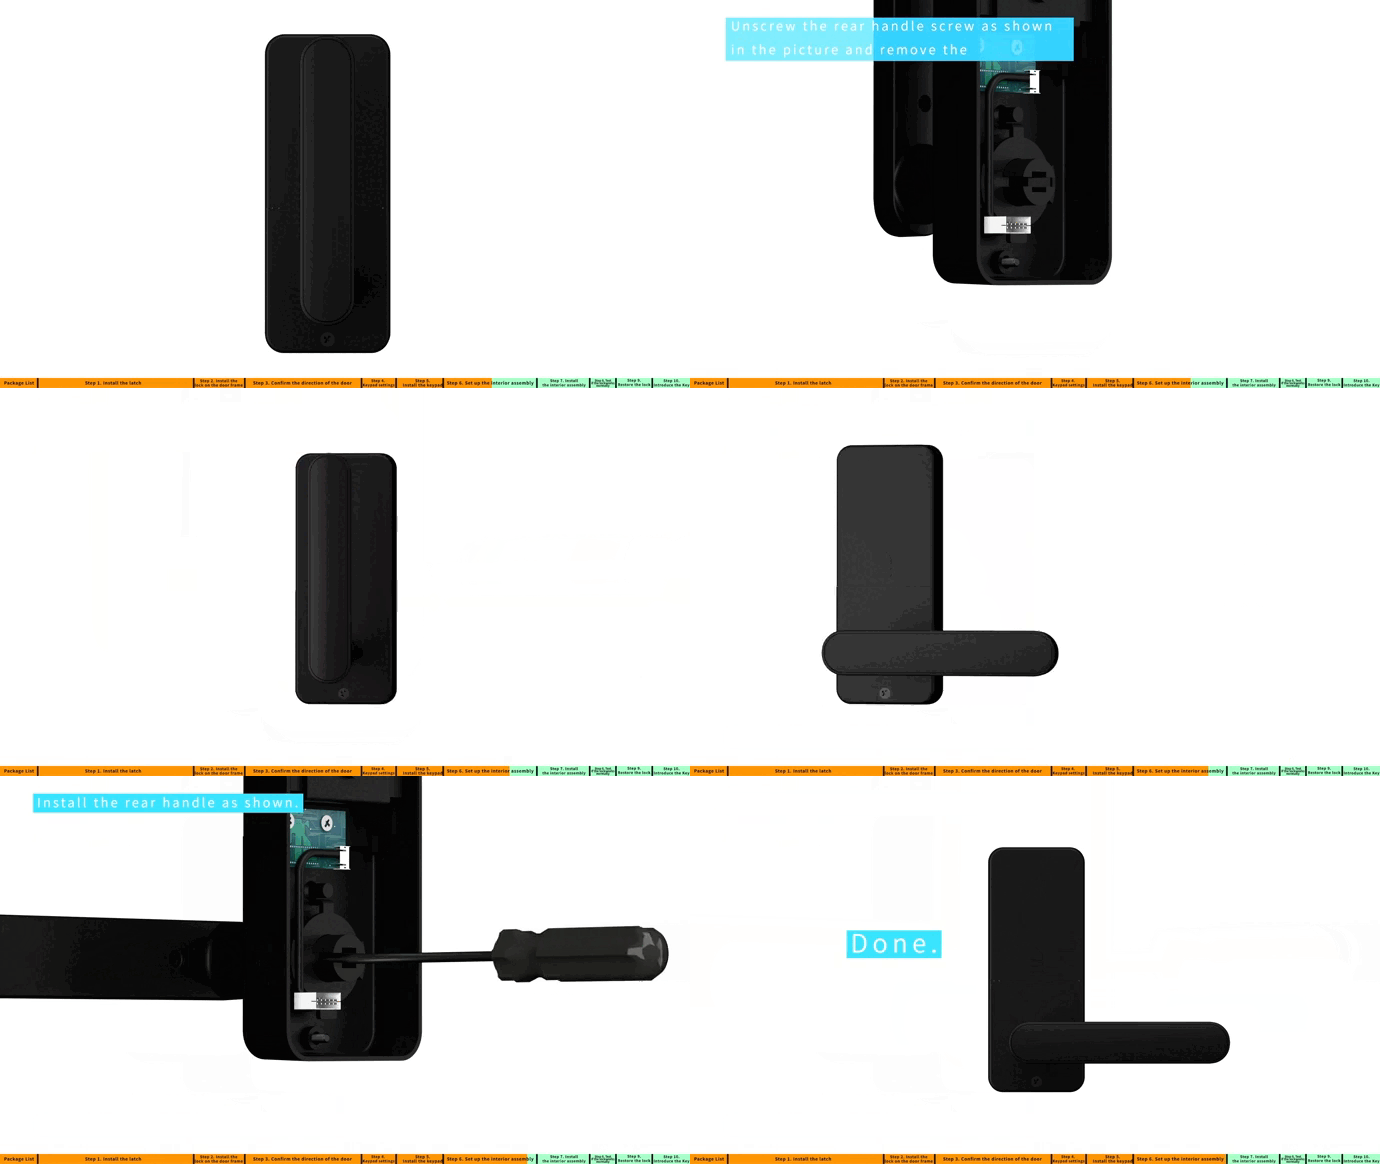
15/19
Set up the interior assembly:
1.Unscrew the rear handle screw as shown in the picture and remove the handle.
2.Rotate the rear handle 90° to the RIGHT.
3.Install the rear handle as shown.

16/19
Install the interior assembly:
1.Stuff the data cable into the door.
2. Screwing on.
3.Install 4 AA batteries and battery cover.

17/19
Test if the lock is working normally.

18/19
Restore the lock:
1.Press and hold the rest button.
2. Hold it for 6 second until you hear the sound of beep.

19/19
Introduce the key


